MY FIRST ANIMATED SHORTS
A SHORT FILM BY MATT SIEGEL
At the beginning of November, I made a resolution to start and finish my first short film. The goal was to rip off the band-aid and get something out there to make it feel less intimidating to make longer, more narrative shorts in the future. The film premiered on 11/29 in Los Angeles at “Silverlake Shorts”, a monthly screening event.
I came up with the concept of using wordplay to make the “animated shorts” joke, and then decided it would be fun to have a compilation of animated shorts that escalate in silliness and insanity as the film progressed. I knew I wanted to keep it under 60 seconds, as it’s a pretty silly and simple joke and I didn’t want to overdo it. The result is just 10 quick shots (and a few animated title cards).
All of the 3D elements were made in Houdini and rendered using the new, native Karma XPU render engine. I used After Effects to comp everything together as well as add effects to some of the shots. The music was composed by Hunter Tredway, Bassist of Atlanta-based Hedonistas and Audio/Video Producer at Sailorface.

SHOT 1 - RUNNING SHORTS
For this shot, I used one of the native mocap characters in Houdini. I isolated the pants, clipped them down so they looked like shorts, deformed them with a Houdini mocap running animation, and then ran them through a cloth simulation to keep them from intersecting during the animation.

SHOT 2 - DIAGONAL OFFSETS
This shot actually used the same render that I used in Shot 1. The render had an alpha layer, so I was able to use After Effects to clone, change the color, and offset them.

SHOT 3 - SCROLLING CHECKERBOARD
Similar to Shot 1, I used a native Houdini mocap character for this. Same process, but I used a cheering motion capture animation. I rendered out a shot with a single pair of shorts with an alpha layer, and then used several precomps in After Effects to add the scrolling checkerboard of shorts in the background.

SHOT 4 - SPIRAL
For this shot, I used Toadstorm’s MOPs plugin for Houdini to instance a bunch of dancing shorts around a huge spiral. I used MOPs Set Sequence Time to offset them along the length of the spiral (“curveu” attribute), and used the same curveu attribute to drive the pscale so the shorts grow slightly larger as they move further down the length of the spiral. A simple variant attribute was generated to vary the colors in the MaterialX shader.
I initially did this shot in After Effects, but ultimately ended up using Houdini because it gave me a greater degree of control over the spiral as well as the ability to quickly and easily make tweaks to the composition — because I built out a procedural system, I could easily change the size of the spiral, how close together the shorts were, how large the shorts were, how much of a time offset they had, etc. etc.

SHOT 5 - CUBE OF JEANS
For this shot, I grabbed a free model of jeans by Nikola Dechev. After some alterations in Houdini, I used the MOPs toolkit to instance the shorts throughout a cube, and then used noise & transform modifiers to add semi-random motion to the shorts.
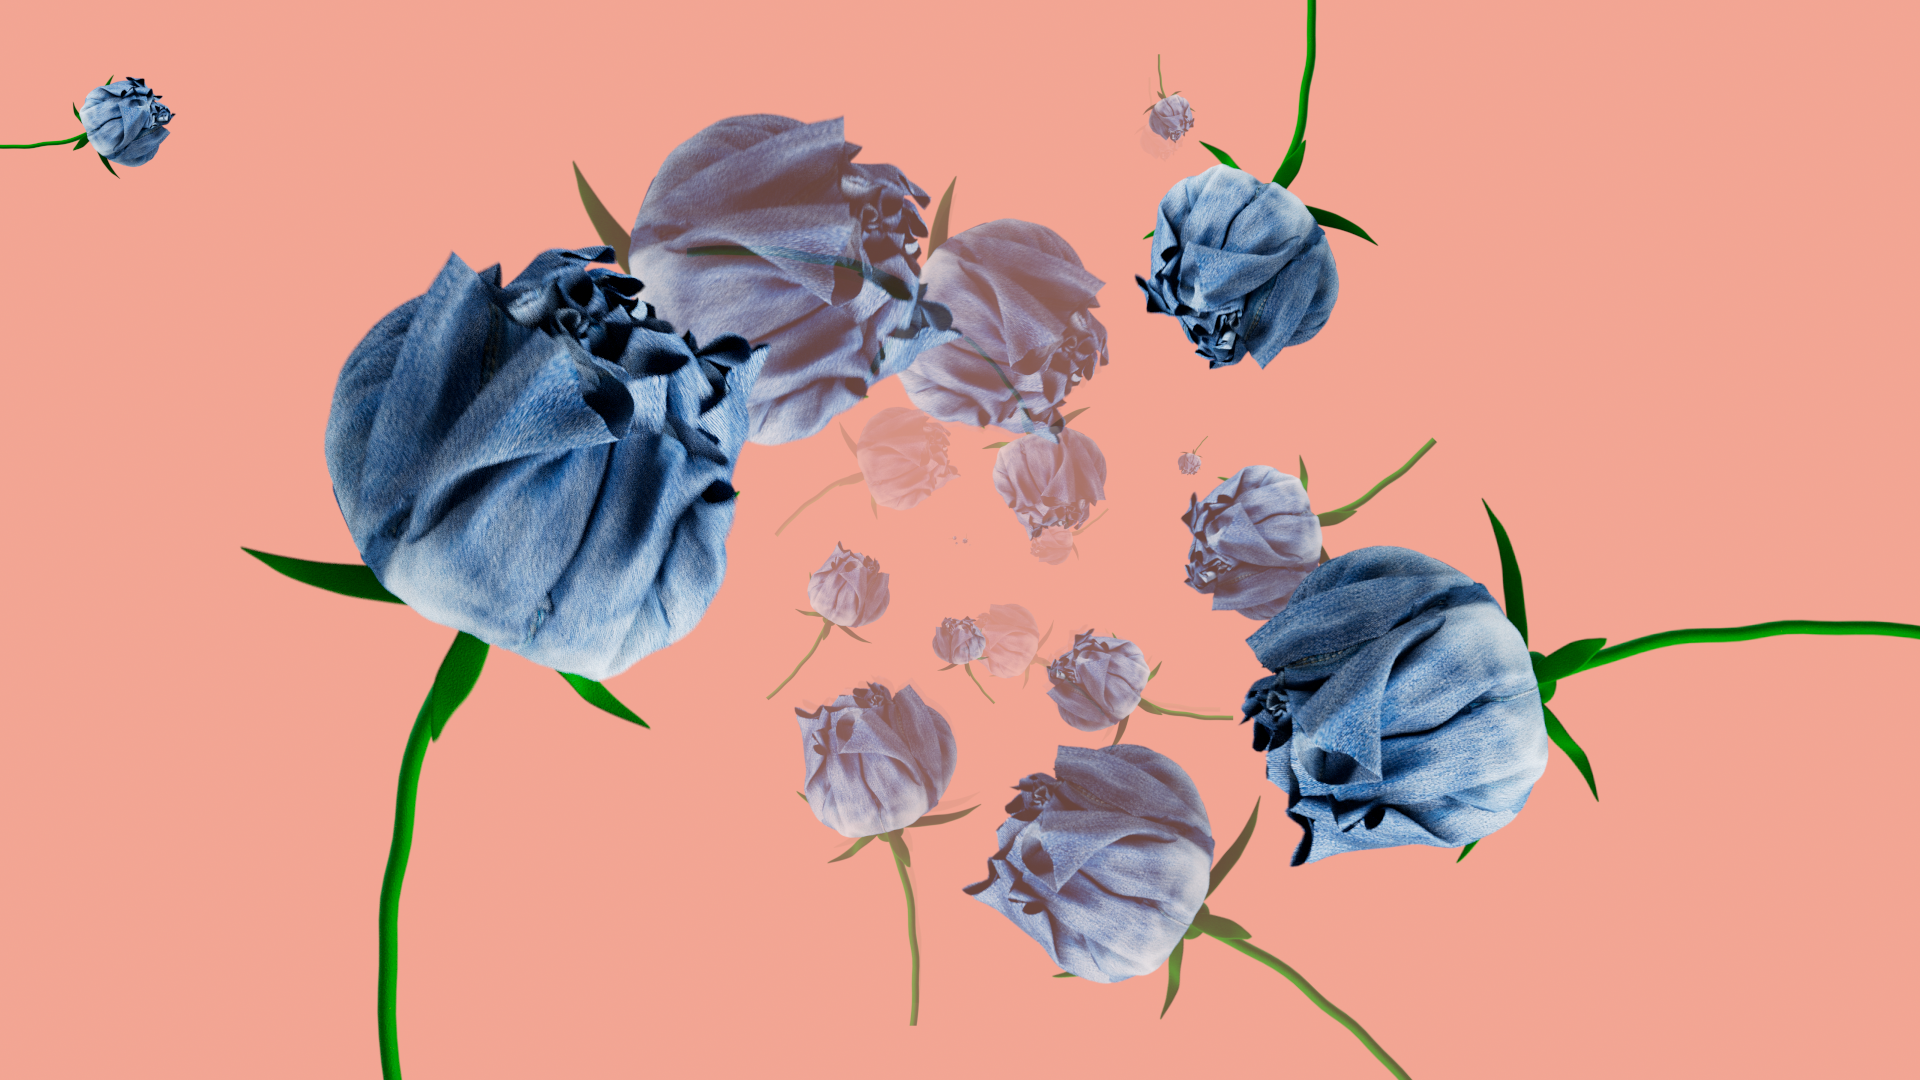
SHOT 6 - JEAN FLOWERS
I have a toolkit of custom-made digital assets that I developed for my Rick & Morty animation that allow me to procedurally build and animate flowers. I matched the size of my jean shorts to a flower petal (including flattening it pretty substantially), and then ran the shorts through the workflow in place of normal petals.
I took the rendered sequence and cloned it in After Effects.

SHOT 7 - COLORFUL JEAN SIMULATION
This was a really simple one. I used the same jeans model that I used in the previous two shots. I made a low-res, poly-reduced version of the jeans that I then instanced around a point cloud and set up as cloth using Vellum. Using an attraction force and some wind, I simulated them flying towards the center of the screen and colliding with each other.
I then took the original, higher-resolution pants, instanced them around the same point cloud, and deformed that result by the simulated mesh. The colors came from a variant integer that I fed into the MaterialX shader.

SHOT 8 - DINOSAURS
This is probably my favorite shot from the film, and one of the easiest to make. I used a dinosaur FBX, took the static mesh, scattered a bunch of colored jean shorts on it, and then deformed it using the animated skeleton. One thing worth noting here is that I used Houdini’s Solaris context for this entire short (as it works nicely with Karma XPU and makes setting up cameras, materials, and lights much more intuitive than traditional workflows). Solaris utilizes a USD workflow, so the instancing I did of all of the jeans was actually done in a Solaris point instancer after I saved out the animated jeans to a USD file.

SHOT 9 - INFINITE ZOOM
This shot leaned heavily on After Effects. I rendered out a spiral of animated, colorful jeans shorts using the same setup I built for Shot 4, but swapping out the shorts model. Then I pulled that into After Effects and used the Sapphire Infinite Zoom plugin. I animated a few of the parameters to make it feel like you’re flying through an endless, 3-dimensional, kaleidoscopic world of chaos and insanity.

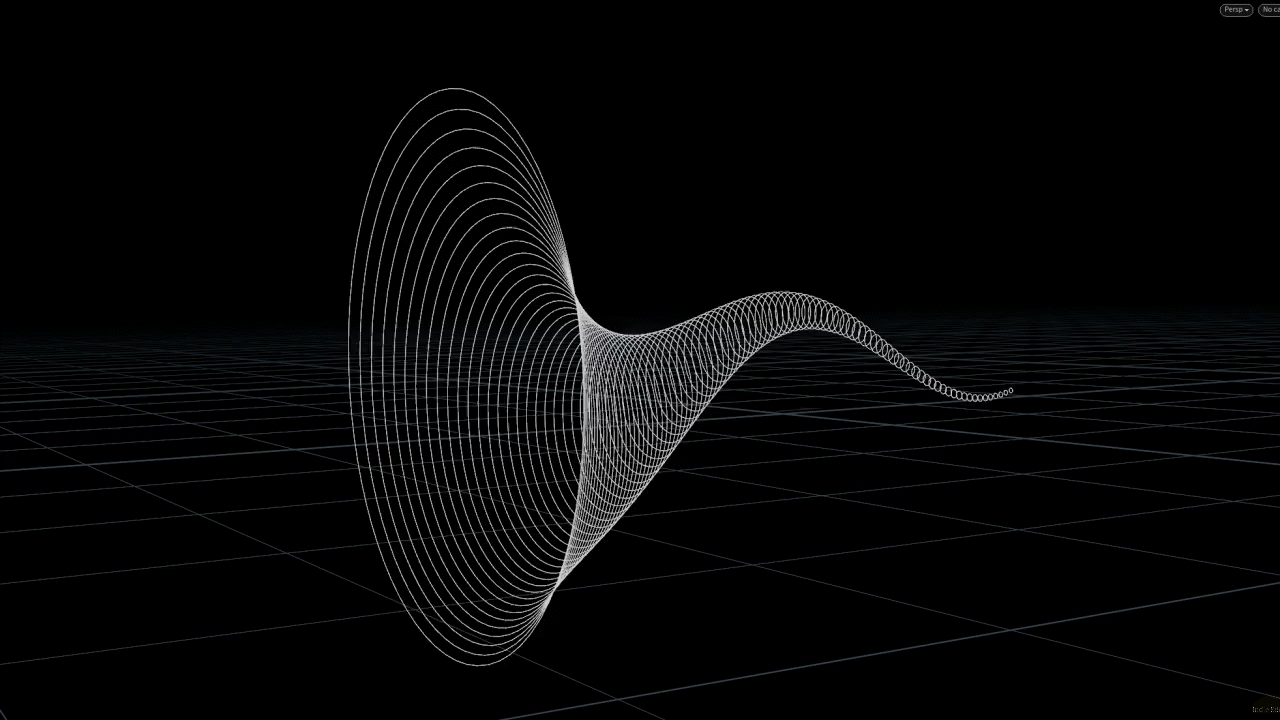
SHOT 10 - ENDLESS TUNNEL FLY-THROUGH
Similar to Shot 8, I used Solaris’s Instancer to instance a USD of animated jean shorts along an endless spiral. The endless spiral was built by creating a circle and then copying and transforming it down the z axis, with a slight rotation and downscaling on each subsequent circle. Then, to get the sinusoidal animation, I ran each circle through a for-each loop and transformed the y-position using a sin function on the z-position of the given circle and then multiplying that by the current Frame. ( .1*sin(360*centroid(0, D_Z) + (@Frame*2)) ).